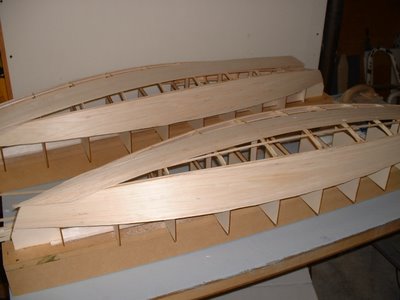
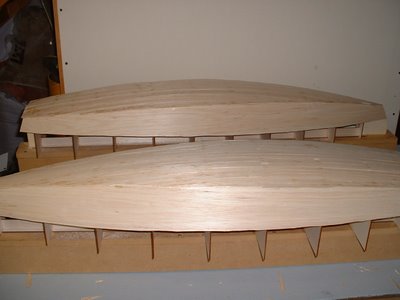
Tampilkan postingan dengan label planking. Tampilkan semua postingan

The Planking Begins

| 0 komentar |
After all the fairing required to make the entire hull flow nicely, there were a few more things to take care of prior to the beginning of planking. We had to deal with things that would be inaccessible after the planking was applied. Anything that could be anticipated and easily placed prior to planking removes the need to try and shape things to fit against the inside curve of the hull at a later time.


The appropriately sized diesel engine was chosen, and the appropriately sized engine mounts were built.


The mounts consist of two skid type mounts sitting above the bottom of the bilge.


The picture below shows how the centerboard case sits in relation to the bulkhead that forms the back of the galley sink cabinet.


The entire interior of the aft lazarette needed to be fiberglassed and epoxied, and the final sanding done to smooth it out, ready for paint. Once the planking is applied, this area will only have a small access hole, not something a person wants to have to manipulate fiberglass and sanders through.


Finally the planking could begin....Richard ordered some beautiful 1 x 6 clear vertical grain Western Red Cedar from Specialty Forest Products in Spokane, WA. It is light weight and rot resistant, and thus is desirable for use in wooden boats. The cost of this special lumber was offset by the fact that the waste factor disappeared by ordering it clear and not having to cut around knots, etc as would be the case in a lesser grade or knottier wood.

He ripped it to 1 1/16" width and planed to 3/4" thickness (the dimension from inside to outside of hull). The width of the strips was recommended at 3/4"-1 1/2". It is necessary to keep the strips narrow enough to be able to run each layer of planking the entire length of the boat and have it bend as needed to follow the lines of the hull. The joints are staggered with each layer and epoxy applied to the joint ends.


Epoxy was spread on each long strip and then applied to hull, starting at the sheer.


Massive numbers of clamps were used. Thanks to cheap clamps from Harbor Freight!


Richard decided to start at the sheer, and to work from bottom up exclusively. The theory behind this was that he would never have to be applying epoxy to the underside of any surfaces and working upside down. The hope was that the strips would flow nicely all the way up the hull since it was faired in all directions.


Smear, clamp....


Smear, clamp, repeat....

Still not much room to get around the hull, especially with all the clamps in place.


Notice also that the opening into the building room from the garage at the bow has been widened and heightened to help with access and ultimate boat removal. It will soon be drywalled and taped, and hopefully it will be the last bit of renovation needed for boat removal.


It still doesnt look like it will fit from this angle! But tapes dont lie, right?


After laying several rows, Richard waits for the epoxy to begin setting, then scrapes the gross excess to avoid a killer sanding job later.

A hand sized piece of laminate works great for this scraping.

Another fancy addition to the tools was the OMER nail gun that shoots plastic nails from Raptor. The beige plastic nails hold the strips in place while the epoxy dries. The use of any metal nails, other than bronze, would result in the nails rotting and weakening the hull, or needing to be removed. The price of a gun that only shoots plastic nails was cheaper than numerous boxes of expensive silicon bronze ring-shank nails and the shipping costs required to get them here. Not to mention the labor to sink all those nails.


The planking picked up speed as the learning curve was smoothed out.

Read More..

Lapstrake Planking cutting a rolling bevel

| 0 komentar |
I recently received an email from Patricia Hong, asking for some clarification on the system I use for cutting plank bevels when building lapstrake (clinker).  I thought the email and my reply (attached to the original in red to save time - we were still in flood-recovery mode) might be of interest to others. Here it is, along with some illustrations for clarity.

?
?
That is me, cutting a plank bevel on the first Periwinkle
? ? 1 :  Is this plane just drilled and a threaded rod put through the body of the plane ? I just drilled one of my low-angle block planes (on a cheap drill press) to accept a piece of brass rod which I had on hand. The rod is a neat fit in the hole, and can slide through to project any length I want, on either side of the plane.

2 :  Does the rod align flat  with the bottom / bed of the plane ? The bottom of the hole (and the bottom of the rod) are 11mm above the bed of the plane. I did this because I had access to cheap pine square-section moldings from the local hardware store which were 11mm x 11mm, and I used these as battens. See answer to next question. 

3 :  The guide / rod appears to be riding on the batten fixed to the mold stations and frames/bulkheads to  follow the rolling bevel of the laps .
Does this batten have to match the thickness of the planking stock in order to cut the correct bevel on the planking stock ?
No, it is independant of the planking thickness, but the batten needs to be the same thickness as the distance from the bed (or sole) of the plane up to the bottom of the rod (or the hole). So if a tangent to the rod was positioned 12mm above the sole of the plane, you would need to use a 12mm batten, and so on. All that you are doing is ensuring that the sole of the plane is parallel with an imaginary line drawn from the point where the next plank touches the mold (i.e. where the batten is positioned - in fact parallel with the bottom surface of the batten) to the bevelled lap on the plank which is already in position. I think my description is confusing, but the attached sketch may explain.


I hope you don`t mind all the questions No, I dont mind at all, and Im only too happy to help where I can , and I hope they make sense to you Yes they do, and I think they are very sensible questions , as  I would really try my hand at clinker / (  lapstrake? )  boat building , and your method of cutting rolling bevels appears to be the best way to do this. Glued lapstrake is my favourite method of construction for small craft. It is nowhere near as difficult as some people imagine, but it does need the application of some common sense. Please let me know if you want more information. There are several excellent books on the subject,including Iain Oughtreds "Clinker Plywood Boatbuilding Manual" , Tom Hills "Ultalight Boatbuilding" and "How to Build Glued Laptrake Wooden Boats"  by John Brooks and Ruth Anne Hill.
Read More..

Star 45 Construction Planking with edge glueing

| 0 komentar |
[Star45] Update on planking bottom with edge glueing.

John Fisher is ready { 4/19/2007 } to glass his latest boat and is sharing how he planked it. His dad built a ply sided, cedar planked star using titebond II and it came out pretty light and stiff. With this information I started to build another hull using the same materials. He felt that edge gluing the planks added a lot of the strength to his boat. John didnt want to glue in extra wood to hold the pins to keep the planks in place for the glue to dry, so I combined two methods of planking. John liked the quickness of planking with CA and kicker, but it lacked stiffness when sanding the bottom before glassing. So he decided to edge glue the planks and then tack them in place to the frames with CA.

In this photo you can see where John put drops of CA on the planks. The wood is slightly darker.


It worked well. John has an edge glued bottom and he was able to plank it in one evening. To do this John first spray the frames with kicker, then apply titebond III to the edge of the planks. He then would hold the plank in place, tight against the previous plank, and apply a drop of CA to each frame to hold it in place. It did not matter where John started, bow, stern, or middle, but do make sure the CA has set up before moving to the next frame. Once the whole plank was in place he came back and wiped off the extra titebond. To fair the bottom to the sides he used a $10, 6" plane from home depot set at .010" depth of cut. It quickly removed the cedar and a little sanding finished the job.

John had one plank that was too thin that he had to remove, it was harder than expected. He had the use quite a bit of force to break the glue joint at each frame, so he is confident that this method is strong. John will also use this for balsa planked bottoms.

In photo # 10 you can see the stern still needs to be trimmed and sanded. John will probably use a saw to trim in close and then sand to fair it.
Read More..

Sailing Model AMYA Star45 Class Planking bottom of hull

| 0 komentar |
From John Fisher:

Photograph by John Fisher


Photograph by John Fisher


Since it was requested here are a couple of photos of planking the
bottom of my two wood/glass stars. photo 01 is the bottom of the first
star about half way done. Planks are 1/16 X 3/8 balsa. These were cut
from a 48" long sheet. Weigh your balsa before buying it. I would not
use a 3 X 48 sheet that weighed in at more than 22g. It takes 3 sheets
to cover the bottom and you could add another 1 to 1.5 oz by using
heavy balsa.

I started in the middle and worked to the outside. I sprayed the
shadows with kicker, then put down a plank, then added super fast CA to
hold it down. If the kicker was not dry enough it would cure before it
wicked into the joint which would cause the next plank to not fit
correctly. I had some variation in the planks, but once they were
glassed the bottom smoothed out quite a bit.

If I were to do another one I would add the half frames. I will be
adding them to the DXF files in the next couple of days for anyone
wishing to cut a set.

Picture shows the bottom after it was completely planked. On the
second boat I got a nice pattern on the bottom since the balsa sheets
had different grain structure. I sanded the sided flush and got the
bottom relatively smooth, but not perfect. With the balsa planks they
were flexible and if sanded too much you get thin spots at the frames.
The glass smoothed out inperfections. If doing a hard wood bottom the
planks should fit better than what I did with the balsa.

John Fisher 2006 August 15

Read More..

Planking the Deblois Street Dory

| 0 komentar |

Deblois Street Dory Building

Bar Harbor, Maine

Planking the hull


I spent the last 24 hours in Bar Harbor helping a customer get the planking going on his DSD. He has been pining after his own D Street Dory for a few years and is very excited about his project. We met at the Small Reach Regatta, where he and his wife row and sail their current stitch-and-glue dory. He wanted to build a real dory and one with more performance and capacity than the others available. He chose the DSD!

Hull #1 built in 2007, on the shores of the Maine Coast


He set up the strongback very accurately, scarphed planks, and got everything ready for my visit. I arrived at 11am and after the 10-cent tour of his new, beautiful, custom house perched on the edge of Acadia National Park, we got to work. By 8pm we had the garboards fit and glued and looking perfect. Pretty good time for 2 people going hard at it and taking a lunch and dinner break, too. Garboards are often a two-day project because they can be the trickiest to fit.

The latest mkII version of the DSD under construction on MDI

The DSD kit is available, just give a call at 207.602-9587 or email boatkits@gmail.com


Read More..

Found Wooden model boat planking

| 0 komentar |
Knowing Wooden model boat planking meet here now i Know and you can take a benefit from here this about Wooden model boat planking this is a little from other website Model ship kits, wooden ship model kits, books, tools, Ship model kits, for discount prices specializing in wood ship model kits, model ship books, tools and ship model supplies. nature coast hobby shop.
Read More..

Model ship building planking Guide

| 0 komentar |
Foto Results Model ship building planking Wooden Model Ship Hull Planking Model Ship Planking Techniques 17th Century Ship Models Building Wooden Model Ships Building a Model Ship Display Case
Read More..