Well what a busy day.
First I brushed off the roof that was gritted yesterday. I think the pictures say it all.


Im very pleased with the finish, paint it next
Then I set too with gritting the port gunwale. I had previously marked the line so this morning it was masking.


The masking and shaping took about 2 hours believe it or not, this was shown live on the new Live Stream at the top of the page. More on that later.
All then needed to do was to apply the paint and grit.


This time course carborundum
Later in the afternoon my brother turned up to add some more stone surfaces to the boat.
The first job on this was to make a support to take the cantilever of the breakfast bar. This was done about a week ago in preperation.

First I drilled 4 x 20mm holes in the work surface and made some hooks from 10mm studding.

The hooks then passed in to the holes

The hooks were then used to anchor down a length of 4 x 2 which was also glued down.
So all that was left to do was put the stone on.

Cladding
Then a pre-made ply infill was screwed onto the the surface of the cladding.

On to which the top surface and the finished breakfast bar was glued.

Da Dah!
I have to confess to breaking a bit of the thin cladding. But my brother managed to re-join it and it wont even show. Clever sod!
Then to the bedroom.

Cimstone (man made stone)
with mother of pearl & tigers eye flecks
with mother of pearl & tigers eye flecks
There is one of these each side and there will be some upstands to be fitted later.

And so the the Live Streaming.
This is my iPad which Ive made up a holder for it and mounted it on a tripod.

Camera side
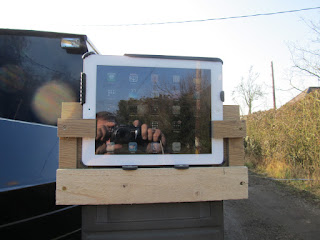
Screen side
 Cant put it off another day.... to misquote the Chambers Bros. song. I ran out of other things to work on so I finally had to come to grips with whacking a big hole in the deck of my boat. First, the screws and shims that had held the hatch frames in place were removed. Then holes were drilled from underneath at the corners of the hatches to define the margins. Once underway, it seemed like no big deal. The first picture shows the hatch frames put in place before the subdeck and cover planks.


 The last picture shows primary latch installed. The latch plate will need to be extended since the latch location is too far away from the margin due to not wanting to interfere with perimeter banding.
